

 Русский
 Turkish
 Português (Brasil)
 한국어
한국어 العربية
 Español
 ไทย
ไทย Tiếng Việt
 Français
 中文
中文 Deutsch
 Bahasa Indonesia
 Italiano
 日本語
日本語 Polski
 Українська
 فارسی
فارسی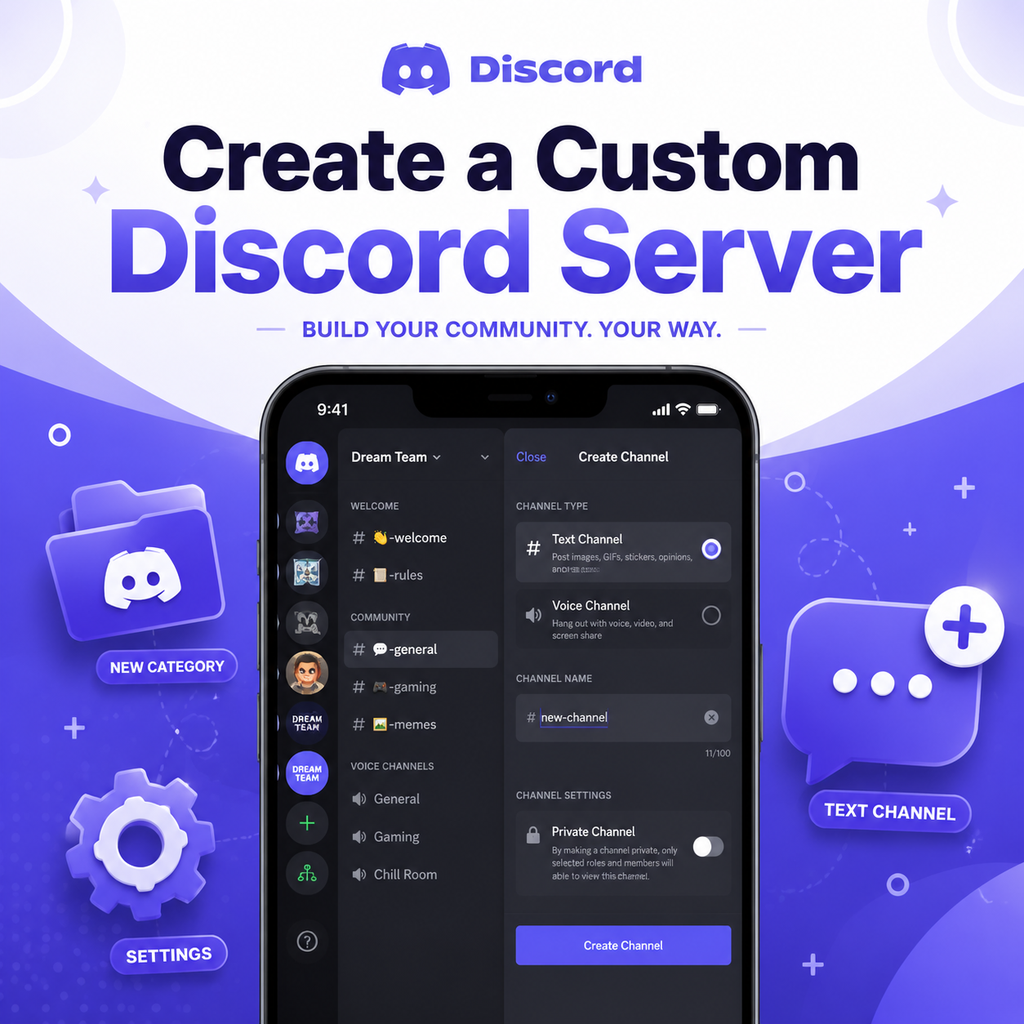
Getting Started: Creating Your Discord Server
To make a Discord server, open the Discord app and click the plus icon (+) on the left sidebar. Choose "Create My Own" and select either "For a Club or Community" or "For Me and My Friends" depending on your needs. Give your server a name and optionally upload an icon. Once created, you'll land in a default setup with a few starter channels like #general and #voice. But that's just the beginning — the real magic happens when you customize channels to fit your community.
Think of your server as a digital living room. You wouldn't throw all your furniture into one giant pile, so don't do that with your channels. The key is to plan before you click. Start with a vision: what will people do here? Chat about hobbies? Play games? Discuss work? Let that guide your channel creation.
Designing Your Channel Categories
Categories are folders that group related channels, keeping your sidebar tidy and intuitive. Right-click on the server sidebar, select "Create Category," and name it. Common categories include "General," "Voice Channels," and "Gaming." For a themed server, get creative — "The Tavern" for social chat, "The Library" for resources. Drag channels into these categories to maintain order.
Use naming conventions that stand out. Many creators use all-caps category names with emojis, like 📢 ANNOUNCEMENTS or 🎮 GAMING. This helps members quickly find what they're looking for. Remember, less is more — avoid overloading with too many categories. Stick to 3-5 main ones.
Naming Channels with Clarity and Style
Channel names should be concise and descriptive. Use lowercase with hyphens (e.g., #game-discussion, #memes) for a clean look. Emojis add personality, but don't overdo it — one emoji per channel is enough. For example, 🎮game-chat or 📷photo-share. To add emojis, right-click the channel, choose "Edit Channel," and paste the emoji in the name field.
Consider using invisible unicode characters to create spacing or line breaks for visual separation. This trick makes your channel list look polished. For voice channels, use headphones emojis (🎧) to differentiate them from text channels. Consistency is key: choose a pattern (e.g., all text channels with chat emojis, all voice with sound emojis) and stick to it.
Setting Permissions and Private Channels
Permissions control who sees what. To make a channel private, go to channel settings, select "Permissions," and disable the @everyone role's "View Channels" permission. Then add specific roles or members who should have access. This is great for secret clubhouses, moderators-only discussions, or sensitive topics.
Use roles to organize access. Create roles like "Admin," "Moderator," "Member," and "VIP." For each channel, you can customize permissions — who can read, send messages, upload files, or use voice. This keeps the server clean and ensures members only see relevant channels. For example, hide an #announcements channel from all but a few people who can post, while keeping it readable for everyone.
Using Channel Topics and Pins for Guidance
Every channel has a topic field (visible at the top) where you can describe its purpose or link to important resources. Use this to set expectations: for #general, say "Casual chat about anything!" For #support, list links to FAQ or rules. This helps new members navigate.
Pinned messages are another tool. Pin key messages like server rules, event dates, or resource links. In busy channels, pins ensure important info stays visible. Combine topics and pins to create a self-documenting server — your community will thank you.
Customizing Server Aesthetics with Emojis and Banners
Make your server visually appealing with custom emojis and a unique banner. Upload a server icon that represents your community — hold a contest if needed! For boosted servers, you can set a custom banner image and invite splash. These assets give your server a professional, branded look.
Emoji stickers can celebrate in-jokes or moments. For a board game server, use chess pieces as emojis. You can also create channel banners using image software (like Canva) and upload them as channel headers. This is especially effective for locked channels like #rules — a polished header sets the tone.
Creating Breakout Channels for Active Topics
Instead of guessing every channel upfront, start simple and let your community guide you. If members constantly chat about video games in #general, create a dedicated #videogames channel. If a subgroup dominates that channel, break it out further into #jrpgs or #fps. These are called breakout channels, and they keep conversations focused without overwhelming everyone.
Not every topic needs its own channel. Observe what generates buzz: if a topic sparks daily discussions, it's a candidate. But avoid creating channels for one-off events — they'll gather dust. The goal is to have every channel serve a purpose, not to fill the sidebar.
By combining these strategies — thoughtful categories, clear naming, smart permissions, and visual customization — you'll build a Discord server that feels both organized and alive. Let your community's needs evolve the structure over time, and don't be afraid to tweak. After all, a great server grows with its people.